Sunday, June 9, 2013

A work-around: Revit Renders smooth curves with facets, and other revelations.

I've been consulting recently and in doing so I came across two things that I find bothersome with Revit, one which I have a work-around for and the other just sucks.
First let's talk about the one I have a work-around for, and that is the lack of smoothing of curves in renderings. Here is my example:

In the render, you can clearly see that what should be a smooth circle, is rendered as faceted.


Here you can see it in Realistic view in Revit to the left and being edited to the right and the circle appears as it should.
This isn't a new issue. It's been around for quite a while, per this AUGI post from 2008. So the work-around I came up with was to use the split tool:
and split the circle in their sketches in the family editor so there are more divisions to the curve. This forces Revit to render more accurately, although still faceted.

Here I have split the linework in the sketches for the circles and re-rendered with a better but not perfect result. The reflections on the default Brushed Stainless material suck. I mean, not even close.
The second bothersome issue has to do with a certain material used often in Interior projects. This is Brushed Stainless Steel. There is no work-around for this other than Photoshopping it. Autodesk provides a wide array of materials for use in typical construction and they have been working over the years to make them better and then they moved to conform them across platforms and I'm sure have spent a great deal of effort trying to provide a useable library for rendering and that's all well and good except when it comes to this material type... The issue with Brushed Stainless Steel has to do with the inability of Revit to handle Anisotropic reflection rotation -that is the brushed groove alignment's effect on light reflections based on a viewer's relative position. You see, according to my research Anisotropic reflections on typical materials are horizontal, which is how Revit renders every material. Brushed stainless on the other hand reflects anisotropic light vertically. Here's how it's done in Maya with great realism. So the message is, if you need to render your project's Kitchen with it's Stainless steel appliances, use Maya, or fudge it in Photoshop.
Here's my draft with Photoshop:
So, lesson is, Revit is not so much a product design application and I should use Maya or Max or Inventor :P
Cheers,
Craig

Tuesday, June 4, 2013

Product Design Suite Test Drive -- Revit - Inventor BIM Exchange


This is a short demonstration from Autodesk of the BIM exchange from Inventor to native Revit family file. Manufacturers take note! Architects and Engineers don't need intricately detailed virtual products as Revit families. We need simplified generalizations of the products extents and clearances. The Inventor BIM exchange looks like it's made your work much simpler.
Cheers,
Craig Barbieri

Tuesday, May 21, 2013

BIM infographic

I came across this infographic the other day on the Line/Shape/Space blog. I always find new metrics/statistics on BIM interesting and you may find this interesting too.
Enjoy!


Friday, February 8, 2013

IDEA studio


There's a great opportunity here if you are a student. IDEA Studio is calling for proposals for Student in residence at Autodesk. Act fast ....you only have until the 15th to get it in.

http://labs.blogs.com/its_alive_in_the_lab/2013/02/call-for-proposals-for-the-idea-studio-by-february-15.html?utm_source=dlvr.it&utm_medium=twitter

Monday, January 14, 2013

Revit Hatch patterns revisited

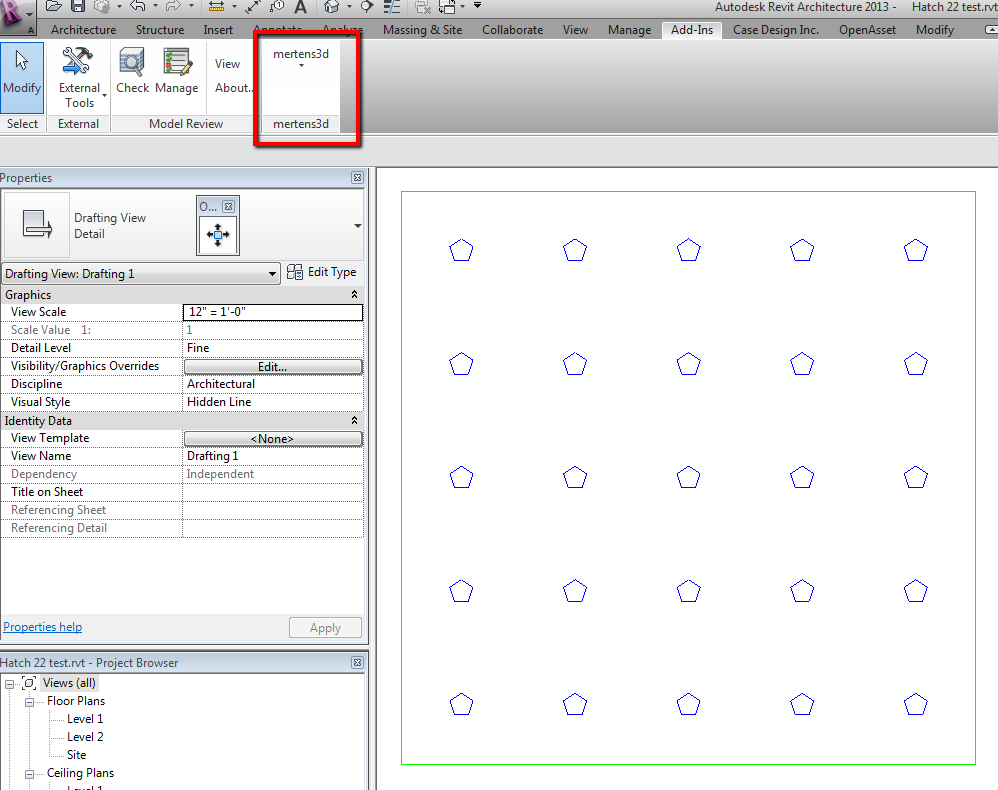
A long time ago I talked about the in's and out's of hatch patterns in Revit and how they are made from scratch. I'm not sure why the universally used functionality hasn't been addressed in any shape or form by the Factory but thanks to some talent out there in the world, there are easier ways to address patterns. I recently came across Hatch22, a fairly easy-to-use Revit Add-in that addresses the missing functionality. It's Pay as you Please and worth a look if you find yourself in need of non-standard patterns. I found the instructions fairly concise and thorough except for a few things: The View type (Dratfting/Detail/Model) in which you draw your pattern was vaguely referenced, and the wording describing how drawing Scale relates to the pattern and it's output was unclear. The plugin dialog looks like so:

You essentially draw your pattern and pattern boundary in a Revit drafting view, and use the four line styles Hatch22 loads into the file to help the lines do what you want them to do.
The Add-in and a new pattern for a Perforated Ceiling tile
I found that it did not recognize circles, spitting out a blank boundary file and that it had some issue with some of the hexagon linework, to where it had to be "corrected". All in all it's a good tool and Gregory Mertens deserves some patronage for his work.
Cheers